


Simple Homemade Granola Recipes with Natural Ingredients

Why settle for store-bought granola when you can whip up your own at home? Homemade granola isn’t just about controlling ingredients it’s a delicious way to embrace clean eating, save money, and flex your culinary creativity. Imagine a batch tailored exactly to your preferences, using affordable, wholesome ingredients you already have in your pantry.
- Easy-to-follow recipes for making your own granola.
- Tips for storing your creations to keep them fresh.
- Quick FAQs to answer your most pressing granola questions.
Ready to take breakfast or snacking to the next level? Let’s dive into the world of homemade granola and create something that’s as nutritious as it is mouthwatering.
Why Make Homemade Granola Instead of Buying It?
- Control Over Ingredients: You get to handpick what goes into your granola. From hearty rolled oats to natural sweeteners like maple syrup or honey, each ingredient can reflect your clean eating priorities.
- Dietary Customization: Whether you’re vegan, gluten-free, or nut-free, homemade granola allows for seamless adjustments. Swap out nuts for pumpkin seeds or use gluten-free oats you’re in charge!
- Enhanced Freshness: Nothing beats the crunch of freshly baked granola straight from your oven. Store-bought varieties sit on shelves for months, but homemade provides a superior texture and flavor.
- Cost-Efficiency: Building your granola from scratch often costs less in the long run, especially when buying ingredients in bulk. Plus, you’ll avoid paying premium for fancy branding!
Homemade granola isn’t just about being healthy it’s about empowerment in your kitchen. And if you’re already exploring high-protein low-fat snacks to support your lifestyle, a personalized granola mix is the perfect addition. So, why settle for store-bought granola when you can prepare a perfectly tailored batch in under 30 minutes?
Step-by-Step: How to Make Homemade Granola
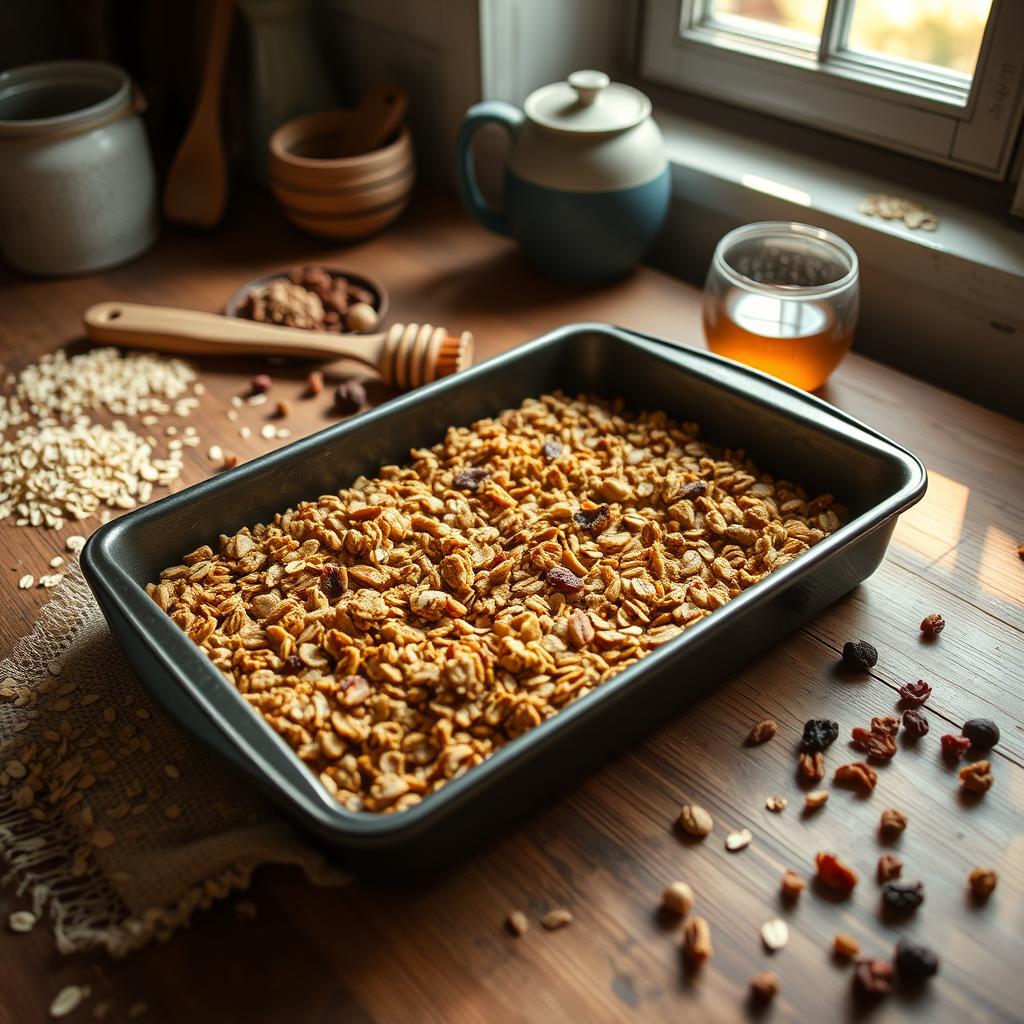
There’s nothing quite like the scent of freshly baked granola wafting through your kitchen. Making granola at home is surprisingly easy, and the best part? You can fully customize it to suit your taste preferences! Follow this simple guide to create your own delicious, healthy granola using natural ingredients.
- Prepare Your Base: Start with rolled oats. These are the staple of any homemade granola recipe and ensure that perfect crunchy texture. Pour 3 cups of rolled oats into a large mixing bowl.
- Choose Your Binding Agent: Add 1/4 cup of melted coconut oil to the oats. Coconut oil not only helps bind the ingredients but also adds a rich flavor. Prefer a different option? Olive oil works too.
- Sweeten Naturally: For a touch of sweetness, mix in 1/3 cup of maple syrup (or honey if you prefer). Both are excellent natural alternatives to refined sugar.
- Add Your Mix-Ins: This is where you get creative! Stir in 1 cup of chopped nuts (think almonds, pecans, or walnuts) and 1/2 cup of seeds such as chia or sunflower. Want something extra? Sprinkle in shredded coconut or a pinch of cinnamon for added flavor.
- Combine Thoroughly: Use a wooden spoon or your hands, if you’re feeling adventurous to coat every single oat and mix-in evenly with the oil and sweetener. Take your time; this step is key to achieving that perfect consistency.
Baking Instructions
Set your oven to 325°F (163°C) and spread the granola mixture onto a parchment-lined baking sheet. Keep it uniform for even baking aim for a thin, flat layer. Bake for 20–30 minutes, stirring halfway through to ensure all components are toasted to perfection. Remember: the longer you bake, the crunchier the granola!
Tips for Optimal Texture and Flavor
- For Extra Crunch: Let the granola cool completely before storing. This step is crucial for achieving that irresistible crispness.
- Experiment with Spices: Try adding nutmeg or cardamom for unique flavor twists.
- Storage: Store your homemade granola in an airtight container to maintain freshness for up to two weeks.
Now, grab a handful, sprinkle it over yogurt, or enjoy it with milk you made this, so own your masterpiece! Your granola is not just a pantry staple; it’s a wholly personal creation with unmatched flavor and texture.
Three Simple Homemade Granola Recipes with Natural Ingredients
1. Classic Cinnamon & Honey Granola
This sweet, satisfying recipe is perfect for beginners. With the comforting warmth of cinnamon and the natural sweetness of honey, it strikes the right balance between taste and simplicity.
- Key Ingredients: Rolled oats, honey, cinnamon, coconut oil, chopped almonds.
- Why You’ll Love It: Easy to make and stores well for up to two weeks.
- Pro Tip: Toast your oats slightly before mixing for extra crunch.
2. Homemade Granola No Nuts
Worried about nut allergies? This nut-free granola is packed with nutritious seeds and dried fruits, making it a safe option for everyone while still being absolutely delicious.
- Key Ingredients: Rolled oats, sunflower seeds, pumpkin seeds, dried cranberries, maple syrup, coconut oil.
- Why You’ll Love It: Allergy-friendly and endlessly customizable.
- Pro Tip: Add unsweetened coconut flakes for a tropical twist.
3. Versatile DIY Granola Base
This recipe acts as a blank canvas for creativity. You start with a simple base and let your favorite spices, seeds, nuts, or dried fruits bring it to life.
- Combine rolled oats, a natural sweetener like honey or maple syrup, and a binding agent such as coconut oil.
- Add spices like cinnamon or nutmeg for flavor.
- Fold in optional extras such as flax seeds, raisins, or pecans for texture.
- Bake until golden brown, cool, and store.
| Recipe Name | Main Ingredient | Dietary Benefit | Customizable? |
|---|---|---|---|
| Classic Cinnamon & Honey Granola | Rolled Oats | Naturally Sweetened | Yes |
| Homemade Granola No Nuts | Seeds & Dried Fruits | Nut Allergy-Friendly | Yes |
| Versatile DIY Granola Base | Rolled Oats | High Flexibility | Yes |
How to Store Homemade Granola the Right Way
So you’ve whipped up a batch of nutty, crunchy, all-natural granola, and now you’re wondering how to keep it fresh and flavorful. The last thing you want is for your carefully crafted creation to lose its crunch or fall prey to moisture. Storing homemade granola correctly is essential and surprisingly straightforward. Here’s everything you need to know to keep your granola at its best.
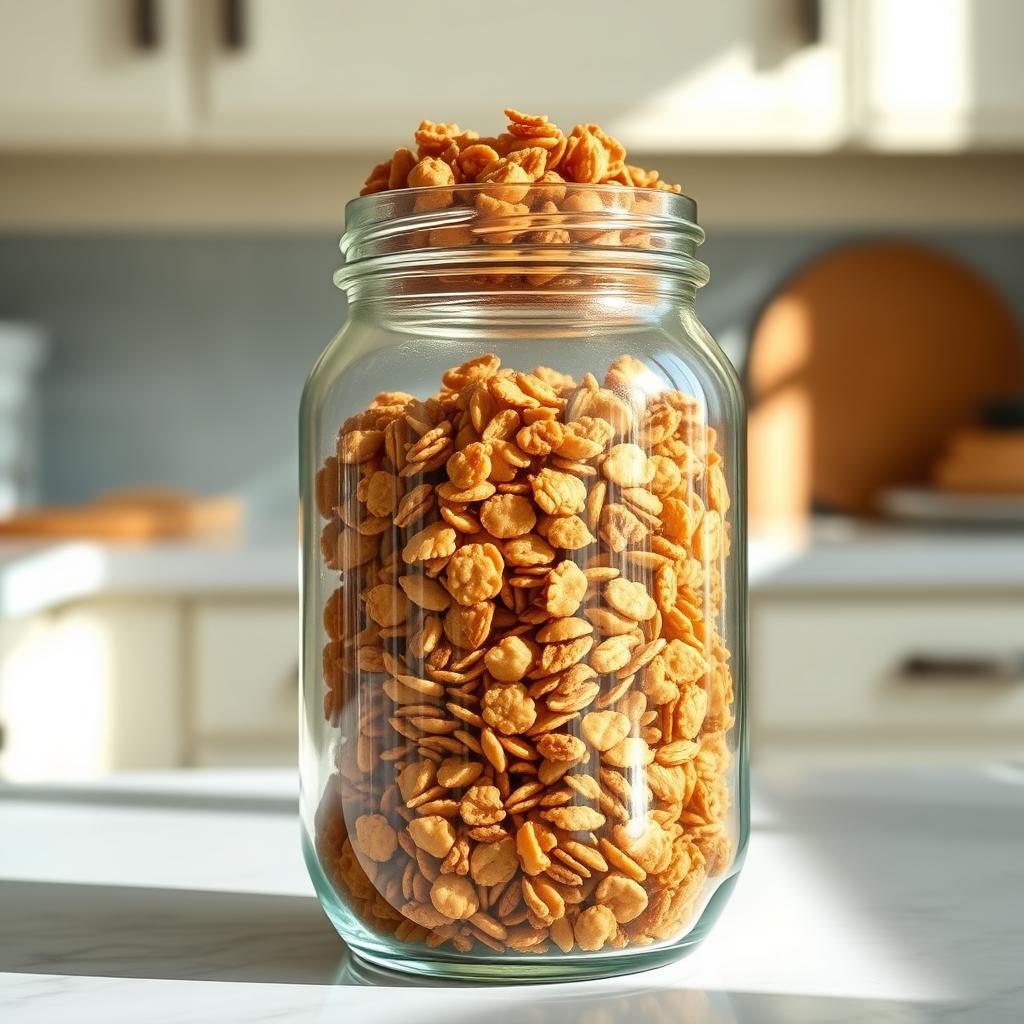
1. Use Airtight Containers
Airtight containers are your granola’s best friend. Whether you opt for glass jars with snug-fitting lids, BPA-free plastic containers, or a sturdy reusable bag with a zip seal, the goal is to lock out air and moisture. This step is key to preserving the granola’s texture and preventing it from getting stale.
2. Find the Perfect Spot to Store It
The pantry is the ideal place for homemade granola. A cool, dry environment ensures the granola stays fresh for longer. Avoid areas that get direct sunlight or fluctuating temperature changes these can degrade ingredients like nuts and seeds. If you’re short on pantry space, a kitchen drawer or cabinet works just as well, as long as it’s moisture-free.
3. Know the Shelf Life
Homemade granola typically lasts about 2–3 weeks when stored properly. While it’s tempting to whip up a huge batch, consider your consumption habits and make smaller amounts if you’re worried about spoilage. If you notice the granola losing its crunch or developing an off taste, it’s time to move on to a fresh batch.
Quick Tips to Prevent Moisture Exposure:
- Let the granola cool completely before transferring it to a container; residual heat can create condensation.
- Keep the lid tightly closed after each use.
- Never store granola near humid appliances like dishwashers or sinks.
Storing homemade granola doesn’t have to be complicated. With these simple hacks, you can maintain its crunch, flavor, and freshness for weeks, making it the perfect snack or breakfast staple any day.
Does Homemade Granola Need to Be Refrigerated?
For most granola recipes, refrigeration isn’t necessary. Dry, crunchy granola made with rolled oats, nuts, seeds, and dried fruits stores perfectly well at room temperature, provided you follow best practices for keeping it fresh. On the other hand, granolas with a softer texture or moist elements, like fresh fruits or yogurt-based drizzle, may require refrigeration to prevent spoilage or loss of flavor.
Best Storage Practices for Homemade Granola
- Cool and Dry: Store your granola in an airtight container in a cool, dry place such as your pantry or a kitchen cabinet. This prevents exposure to moisture and air, which can make the granola stale.
- Use Glass Jars or Containers: A mason jar or glass container is ideal for storage; it seals tightly and keeps your granola fresh longer compared to bags or tubs.
- Avoid Sunlight: Keep your granola away from direct sunlight, which can lead to oxidation of oils in nuts and seeds, compromising taste and quality.
- Refrigeration When Necessary: If your granola contains fresh, perishable ingredients, store it in the fridge in a sealed container. However, note that refrigeration may slightly alter the crunchiness.
Following these tips ensures your homemade granola retains its flavor and texture for up to 2 weeks or longer in the fridge, depending on the recipe. By skipping refrigeration for standard recipes, you also preserve the convenience factor, making granola a grab-and-go staple for busy mornings or mid-day snacks.
Bonus Tips for the Best Homemade Granola
Add-Ins After Baking
Ever wondered why your dried fruit turns into chewy lumps or chocolate chips melt into a sticky mess? The secret is to add these extras *after* baking. Once your granola has cooled completely, toss in dried fruits like cranberries, raisins, or chopped apricots for natural sweetness. But if you’re feeling indulgent, sprinkle in chocolate chips or chunks for a decadent twist. Adding these ingredients post-bake keeps their texture and flavors intact.
Tips for Crunchy Clusters
Love those satisfying, golden clusters? To achieve them, press your granola mixture firmly onto the baking sheet before popping it into the oven. During baking, resist the urge to stir it more than once overmixing breaks up those coveted clusters. For an extra crunch, consider a drizzle of honey or maple syrup before your final stir.
Creative Flavor Variations
Granola is the ultimate blank canvas for bold flavors. Experiment with spices like nutmeg, cardamom, or even ginger for unexpected warmth. Or mix in some coconut flakes, cacao nibs, or chopped almonds to customize your batch. Feeling adventurous? Try a hint of orange zest for a refreshing citrusy kick.
- Press granola dough firmly to maintain clusters during baking.
- If adding dried fruits or chocolate, mix them in after cooling.
- Incorporate spices or zest for unique flavor profiles.
For more inspiration, explore this guide to uncover the secrets of the Best Homemade Granola.
How to Make Homemade Granola: Easy & Delicious!
Crafting granola at home doesn’t just save time; it also gives you control over the ingredients. Why settle for store-bought versions with hidden sugars and additives when you can whip up your own healthy, all-natural mix in minutes? Here’s a quick recap of how simple homemade granola can transform your snack or breakfast routine.
Key Ingredients to Remember
- Rolled oats: The foundation of any great granola – hearty, wholesome, and versatile.
- Nuts & seeds: Almonds, walnuts, sunflower seeds, or chia seeds – pick your favorites to add crunch and nutrition.
- Natural sweeteners: Think maple syrup or honey for a touch of sweetness without refined sugar.
- Coconut oil: Ensures your granola binds beautifully while adding richness to the flavor.
- Optional add-ins: Dried fruits, shredded coconut, or warm spices like cinnamon for extra personality.
The beauty of homemade granola lies in its flexibility. You can tailor each batch to your preferences – swap ingredients, play with textures, and adjust the sweetness. Plus, the preparation couldn’t be simpler. Mix the ingredients, spread them on a baking sheet, and toast until golden. Your kitchen will smell divine!


